Understanding Logos & How to Run a Node
Understanding Logos
I recently came across Logos, and it's fascinating. It’s not just another blockchain; it’s a full-stack network state infrastructure.
Most decentralized apps (dApps) today are Frankensteins—stitching together Ethereum for compute, IPFS for storage, and maybe something else for messaging. Logos aims to be the unified modular stack for building truly local-first, decentralized applications.
The Three Pillars
Logos isn't starting from scratch. It consolidates three powerful existing technologies under one roof:
-
Logos Blockchain (formerly Nomos): This is the compute and state layer. It handles consensus (ordering blocks) and execution (running app logic). Think of it as the "CPU and RAM" of the network. It uses a Private Proof of Stake (PPoS) called Cryptarchia, which keeps block proposers anonymous.
-
Logos Storage (formerly Codex): A decentralized storage engine. If Blockchain is the CPU, this is the Hard Drive. It ensures data persistence and censorship resistance without relying on centralized clouds.
-
Logos Messaging (formerly Waku): A peer-to-peer communication layer. This is the Network Cable. It allows apps to send ephemeral messages (like chat or signals) without clogging up the blockchain.
The "Local-First" Philosophy
What struck me most is the "local-first" approach.
In traditional web apps, your data lives on a server (Google, Meta). In many web3 apps, it lives on a public chain (expensive, slow). Logos pushes for a model where your device is a first-class citizen. You run a node (even a light one), you hold your data, and the network is just there to sync and secure it.
Tutorial: Running a Logos Blockchain Node
Want to get your hands dirty? I just set up a Logos Blockchain Node (Nomos) myself. Here's exactly how I did it on Linux.
Prerequisites:
- OS: Linux x86_64 or Raspberry Pi OS (Raspberry Pi 5).
- Storage: At least 64 GB.
- Dependencies:
glibc2.39+ (check withldd --version).
1. Download Binaries & Circuits
The node requires "circuits" for Zero-Knowledge proofs. Download the latest release (check the releases page for the current version).
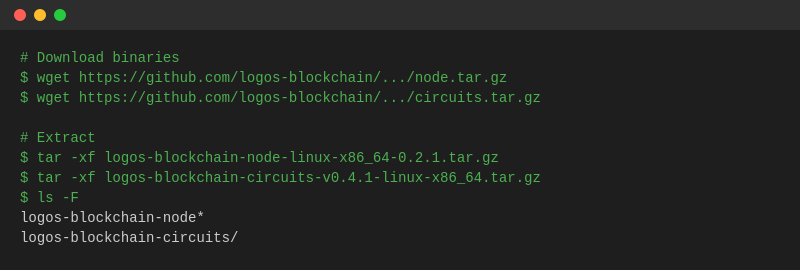
2. Install Circuits
The node looks for circuits in your home directory by default.
bashmv logos-blockchain-circuits-v0.4.1-linux-x86_64 ~/.logos-blockchain-circuits
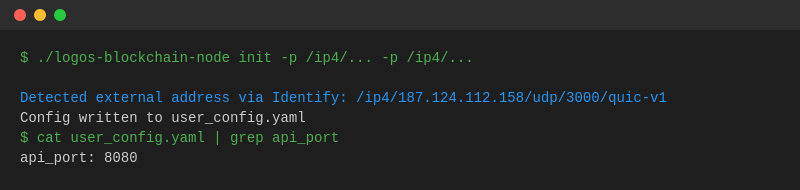
3. Initialize the Node
You need to generate a user_config.yaml and connect to bootstrap peers. I used the peers for v0.2.1:
bash./logos-blockchain-node init \
    -p /ip4/65.109.51.37/udp/3000/quic-v1/p2p/12D3KooWL7a8LBbLRYnabptHPFBCmAs49Y7cVMqvzuSdd43tAJk8 \
    -p /ip4/65.109.51.37/udp/3001/quic-v1/p2p/12D3KooWPLeAcachoUm68NXGD7tmNziZkVeMmeBS5NofyukuMRJh \
    -p /ip4/65.109.51.37/udp/3002/quic-v1/p2p/12D3KooWKFNe4gS5DcCcRUVGdMjZp3fUWu6q6gG5R846Ui1pccHD \
    -p /ip4/65.109.51.37/udp/3003/quic-v1/p2p/12D3KooWAnriLgXyQnGTYz1zPWPkQL3rthTKYLzuAP7MMnbgsxzR
4. Run It!
Start the node with your config.
bash./logos-blockchain-node user_config.yaml
5. Verify It's Working
Once it's running, you can check its status via the local API.
Check Peer Connections & Sync Status:

I successfully connected to 4 peers!
Why Run a Node?
Running a node supports the network's resilience. In Logos, it also means you're helping secure a privacy-preserving consensus layer where even the block proposers are anonymous. That's pretty cool technology to have running on your machine.
Disclaimer: This is for the Devnet. Software is experimental.